An audiophile DIY resistor
Why DIY?
Sometimes you want to adjust a tube just as stated in the documention: for that low THD or because 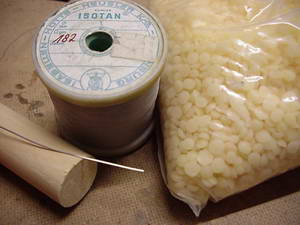 of good reproduction of even harmonics... If you do the math you'll discover that you'll be needing a resistor value that is not standard available for audiophile brands: this will end up in using a standard value and forget about that exact adjustment... That's why DIY...
Ingedients.
You'll need some resistance wire, a bobbin and an idea to finish. On a radio-market I found some old-fashioned resistance wire by IsabellenHütte, Isotan, with a resistance of 182ohms/meter. As bobbin a piece (5cm) of a broomstick is used with a diameter of 28mm. The leads are 0.8mm solid core silver. For a nice finish beeswax is used, this will help fixing the resitance wire to the bobbin and will effectively reduce mechanical hum. This also means that this will not be a high power resistor! I recommend a maximum of 0.5Watt!
 How?
How?
First of all we do the math on how much resistance wire is needed: Divide the needed resistance value by the resistance value of the wire, this case 182ohm. This will give you the needed length in resistance wire. Than determine the outline of the bobbin: that is 2pi R, in this case 14mm x 2 x 3.14 = 87.96, say 8.8cm. The needed length resistance wire is divided by this value and that will give you the number of needed windings to realise the needed resistance. So needing a 960ohm resistor that would be 5.27 meters meaning 60 windings. These windings can be put to the bobbin begin to end or going several times from begin to end and vv. Induction is neglectible mainly because of the rather large diameter. At each end of the bobbin a small hole (1.5mm) is drilled sloping sideways. This way the leads can be inserted and mounted in a loop (see picture), the resistance wire is also soldered to this joint. A hole of 6mm allows for a shaft to be inserted allowing better control when applying the windings. When this is done the resistor can be submerged in "au-bain-Marie" melted beeswax for several times, thus applying a nice finish that is not heat-resistant but will fill in most mechanical hum.
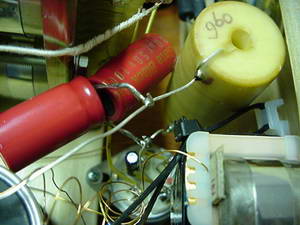
This way (almost) every resistor-value can be obtained. Physical it is a "huge" resistor, especially when compared to a standard 0.5Watt resistor. On the picture above a Mills wirewound 12Watt resistor is in the forground... You'll definetely need some space!
Mounting...
 This resistor can be mounted just like every other resistor. However do not unnecessary heat up the leads and don't place the resistor next to another heat-source to prevent the beeswax from melting! Always check the resistor for working properly before actually using it!
"Food for thought "
This resistor has true audiophile characteristics: Very neutral and clean sound without loosing tonal balance and speed. I compared AudioNote Tantalum (1W and 2W), RikenOhm (0.5W and 1W), Kiwame (1W and 5W) up to Mill wirewound (5W and 12W) and some "old"and "new" stuff but none could match the quality of this DIY-resistor. I use them in my preamp and in my poweramp on the driver as cathode resistor... The combination with BlackGate non-polars in Super E-cap is almost like magic!
On 9-12-2004 the following advice was received:
"Dear Rob,
Nice article. Thanks for writing it in English:-)
To avoid making it a coil it should be winded bifilar. To do it, you should divide the wire into two same length parts, fold it and wind two wires together. You will have the beginning and the end of the resistor at the same end of the bobbin.
regards Maciej"
_______________